
Tomato Basil
15-4. 북스토어 프로젝트 (4) - 모델과 API 연동 - 라우트 작성, API통신, 회원가입 본문
1. 라우트 작성
라우트는 '페이지', '링크를 통해 이동하는 경로' 라고 볼 수 있다.
이 프로젝트에서는 라우트로 가장 많이 쓰이는 'React Router' 라이브러리를 사용할 것이다. (v6)
npm install react-router-dom @types/react-router-dom --save
명령어를 통해 React Router 를 다운받는다.
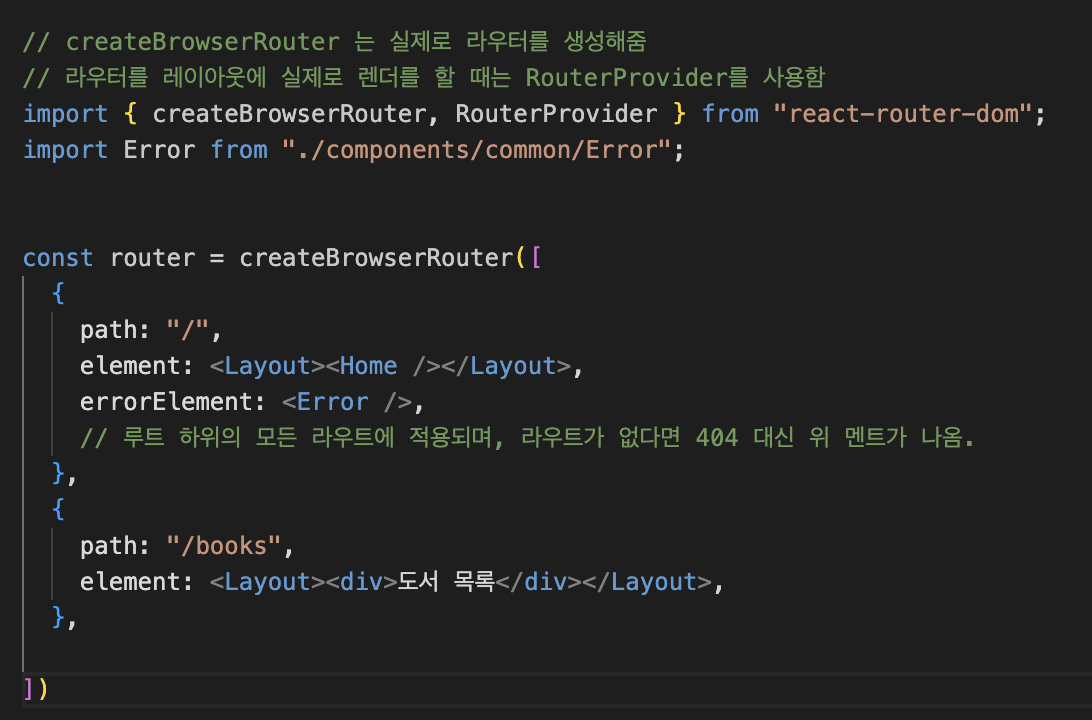
작성할 라우트는 다음과 같다.
1. 로그인 /login
2. 회원가입 /signup
3. 비밀번호 초기화 /reset
1. 도서 목록 /books
2. 도서 상세 /books/{id}
3. 장바구니 /cart
4. 주문서 작성 /order
5. 주문 목록 /orderlist
App.tsx
*) React Router는 a href 가 아닌 Link to 와 함께 작동한다.
(Link를 써야 이동 시 화면 깜빡임이 없다.)
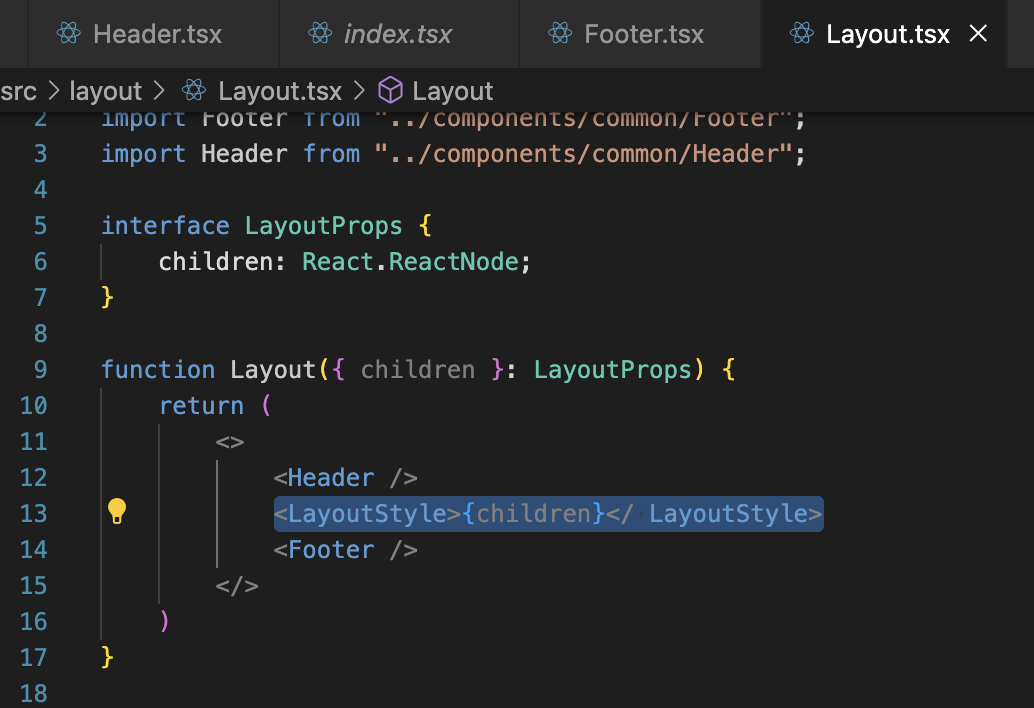
근데 Header의 a href를 Link로 바꾸었더니 렌더가 작동이 안 된다.
그 이유는 Header가 Layout 컴포넌트의 child가 아니기 때문이다.
그래서 RouterProvider가 Layout의 child로 들어가면 안 되고, <Layout>{child}<Layout> 전체를 라우트로 관리하도록 해야 한다.
(Router에서는 Layout을 포함한 폼을 관리 대상으로 한다.)
App.tsx, Layout.tsx

변경 후의 App.tsx

2. 모델 정의
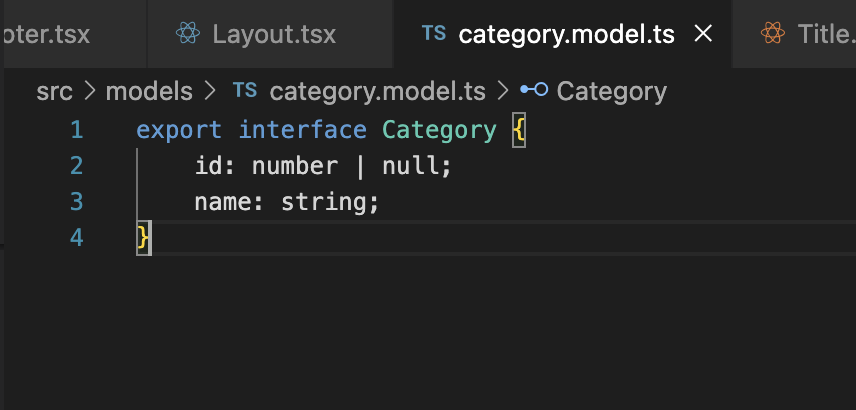
주요 모델
1. User
2. Book
3. Category
4. Cart
5. Order
유저, 도서 정보, 카테고리, 장바구니, 주문 정보
가 주요 모델이다.
모델은 타입스크립트의 interface를 통해 작성한다.
기존에 진행한 백엔드 프로젝트로부터 API 정보를 가지고 모델로 변환하는 작업을 진행할 것이다.
카테고리 - category.model.ts

도서 목록 - book.model.ts

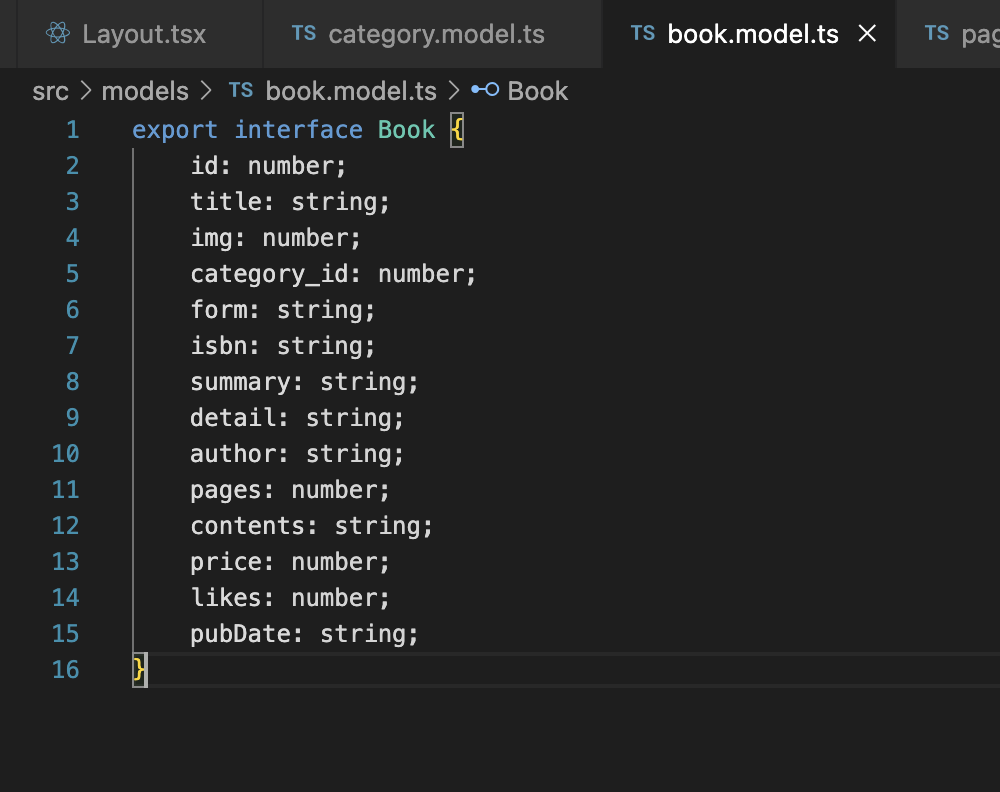
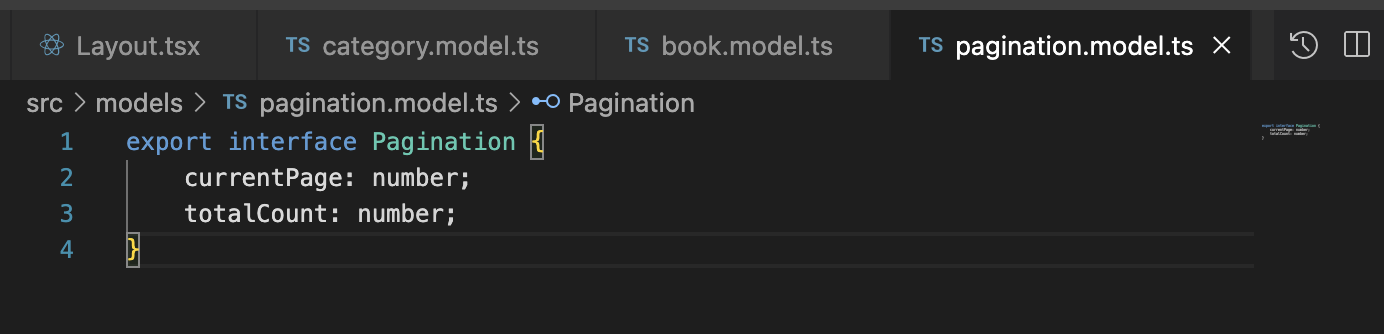
books에는 페이지네이션 정보가 나란히 들어가 있다.
ex)
"pagination" : {
"currentPage" : 1,
"totalCount" : 8,
}
페이지네이션 - paginatioin.model.ts
도서 상세 - book.model.ts에 BookDetail 인터페이스 추가


장바구니 - cart.model.ts


주문 내역 - order.model.ts


3. API 통신과 데이터 레이어
본 프로젝트는 다음과 같은 API 요청 플로우를 가진다.
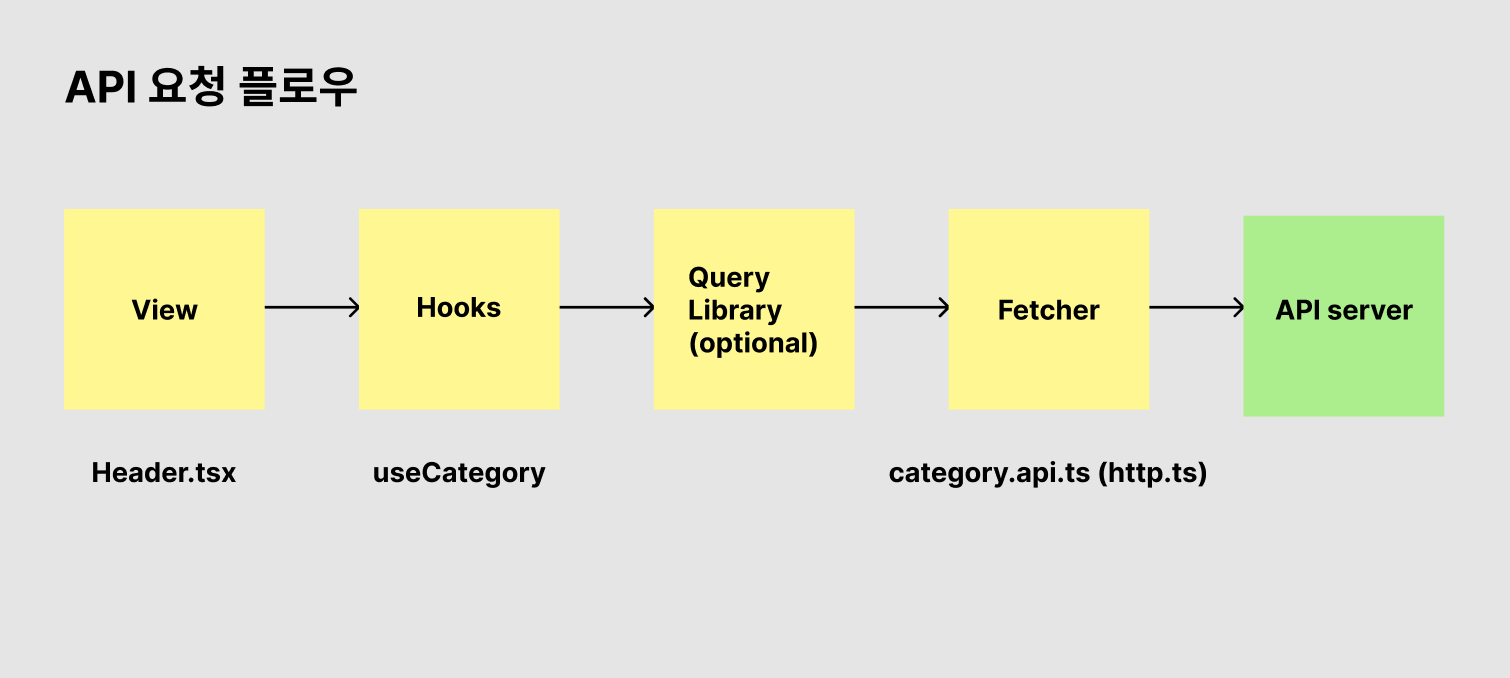
View에서 Hook에게 데이터를 요청하고,
(중간에 React Querry와 같은 Querry Library가 존재할 수도 있고)
Fetcher 안에서는 category.api.ts와 같이 특정 목적으로 하는 fetcher 함수가 있을 수 있는데,
그 fetcher를 감싸는 http.ts 클라이언트가 존재한다.
이제 API 서버와 통신하며 서버로부터 역으로 데이터를 받아와서 넘겨주면 그 데이터를 View 화면에 렌더 하는 것이다.
이렇게 레이어를 고려해서 설계하면
- 렌더 영역을 깔끔하게 유지할 수 있다. 데이터를 직접 fetch해서 넣기보다 Hook이나 별도의 http 클라이언트를 사용하면 깔끔하다.
- Hook을 통해 중복 코드를 줄이고, Hook 안에서 데이터를 가공하는 로직을 구현할 수 있다.
- Fetcher 역시 분리해서 API마다 달라질 수 있는 설정, 변경사항 등에 대응할 수 있다.
이번에는 카테고리 fetch를 예시를 만들어볼 것이다.
실습
axios를 사용할 것이므로 다운받아준다.
npm i axios --save
/api/http.ts, /api/category.api.ts


http.ts와 카테고리 데이터를 fetch해오는 category.api.ts 를 작성했다.
데이터의 타입은 여러 개의 카테고리이므로 Category[] 이다.

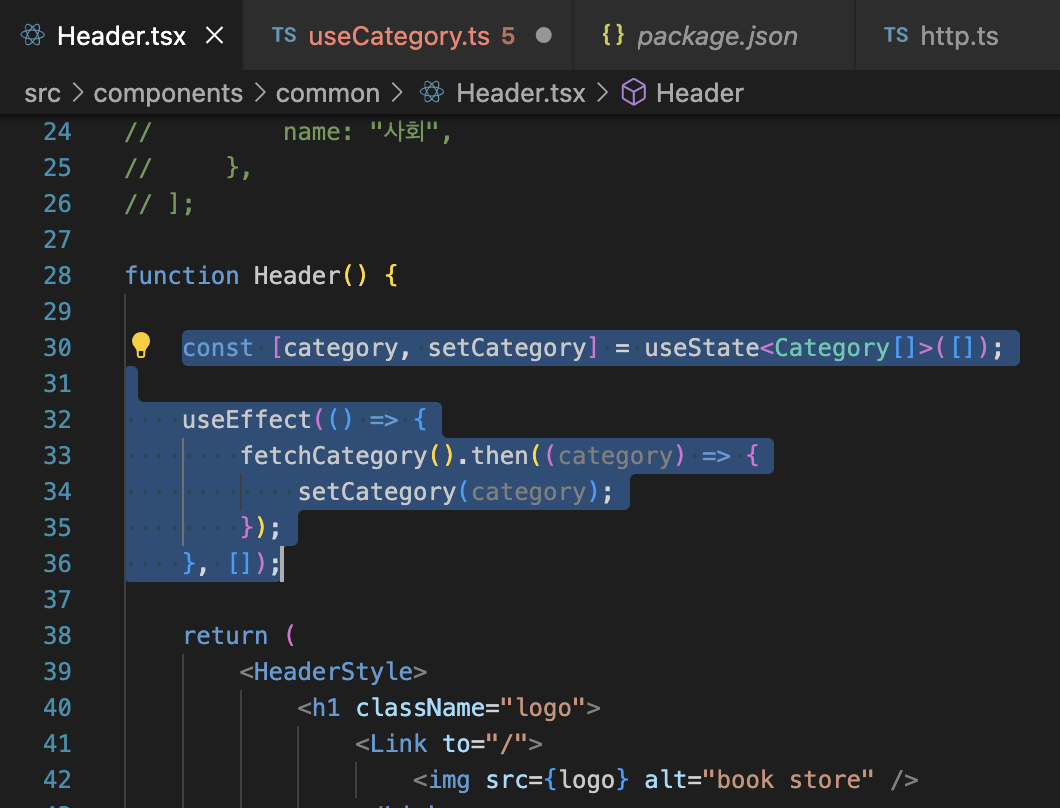
하드코딩했던 카테고리 데이터를 삭제하고, useState로 상태를 만들어주었다.
마찬가지로 Category 라는 타입을 지정해주었다.
아직은 아무 정보도 받아오지 않으므로, 화면에 카테고리 내용이 렌더되지 않는다.
따라서 useEffect를 통해, fetch 함수 (category.api.ts의 fetchCategory)를 통해 카테고리를 fetch 해왔다.
그러면 응답으로 받은 category 값을 setCategory를 통해 상태가 업데이트되게 했다.
conponents/Header.tsx, /hooks/useCategory.ts
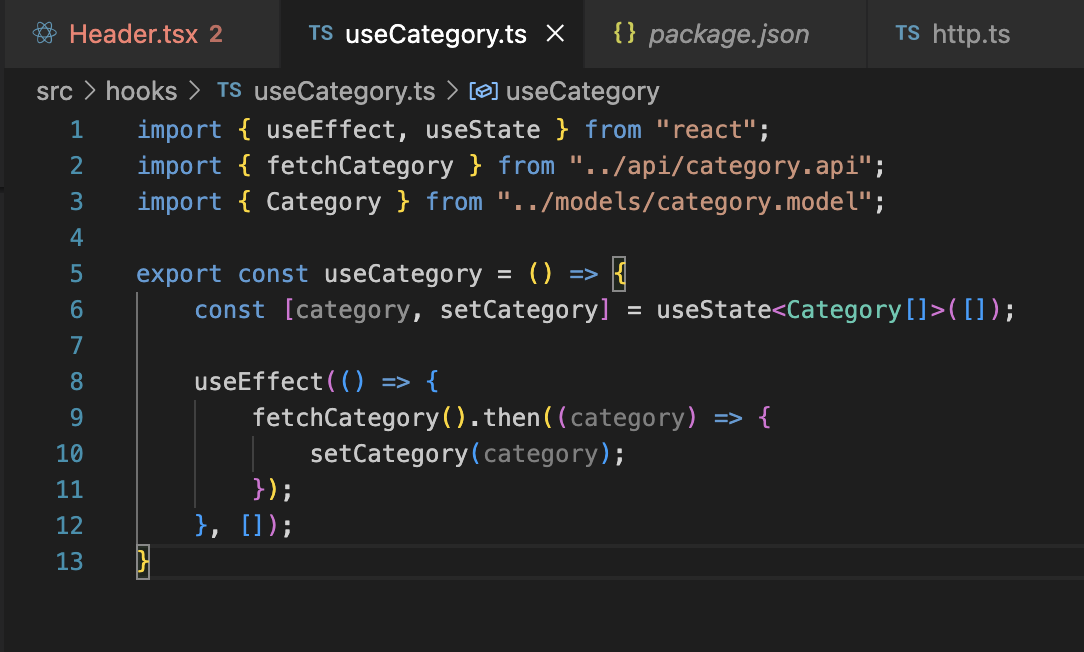
하지만 카테고리가 필요한 부분은 여러 군데인데, 매번 useState와 useEffect를 이용해서 fetch를 해야 하는 고민이 생긴다.
그래서 커스텀 훅을 사용해보겠다.
-> 컴포넌트에서는 훅(useCategory)에서 어떤 동작을 하는지 상관하지 않아도 된다. (훅이 데이터를 가공하는 역할도 함)
-> 훅을 컴포넌트 어디에서든 재사용할 수 있기 때문에, 재사용성이 올라갔다.
/hooks/useCategory.ts를 만들고 Header.tsx에 있던 useState, useEffect 내용을 옮겨왔다.
오류 해결
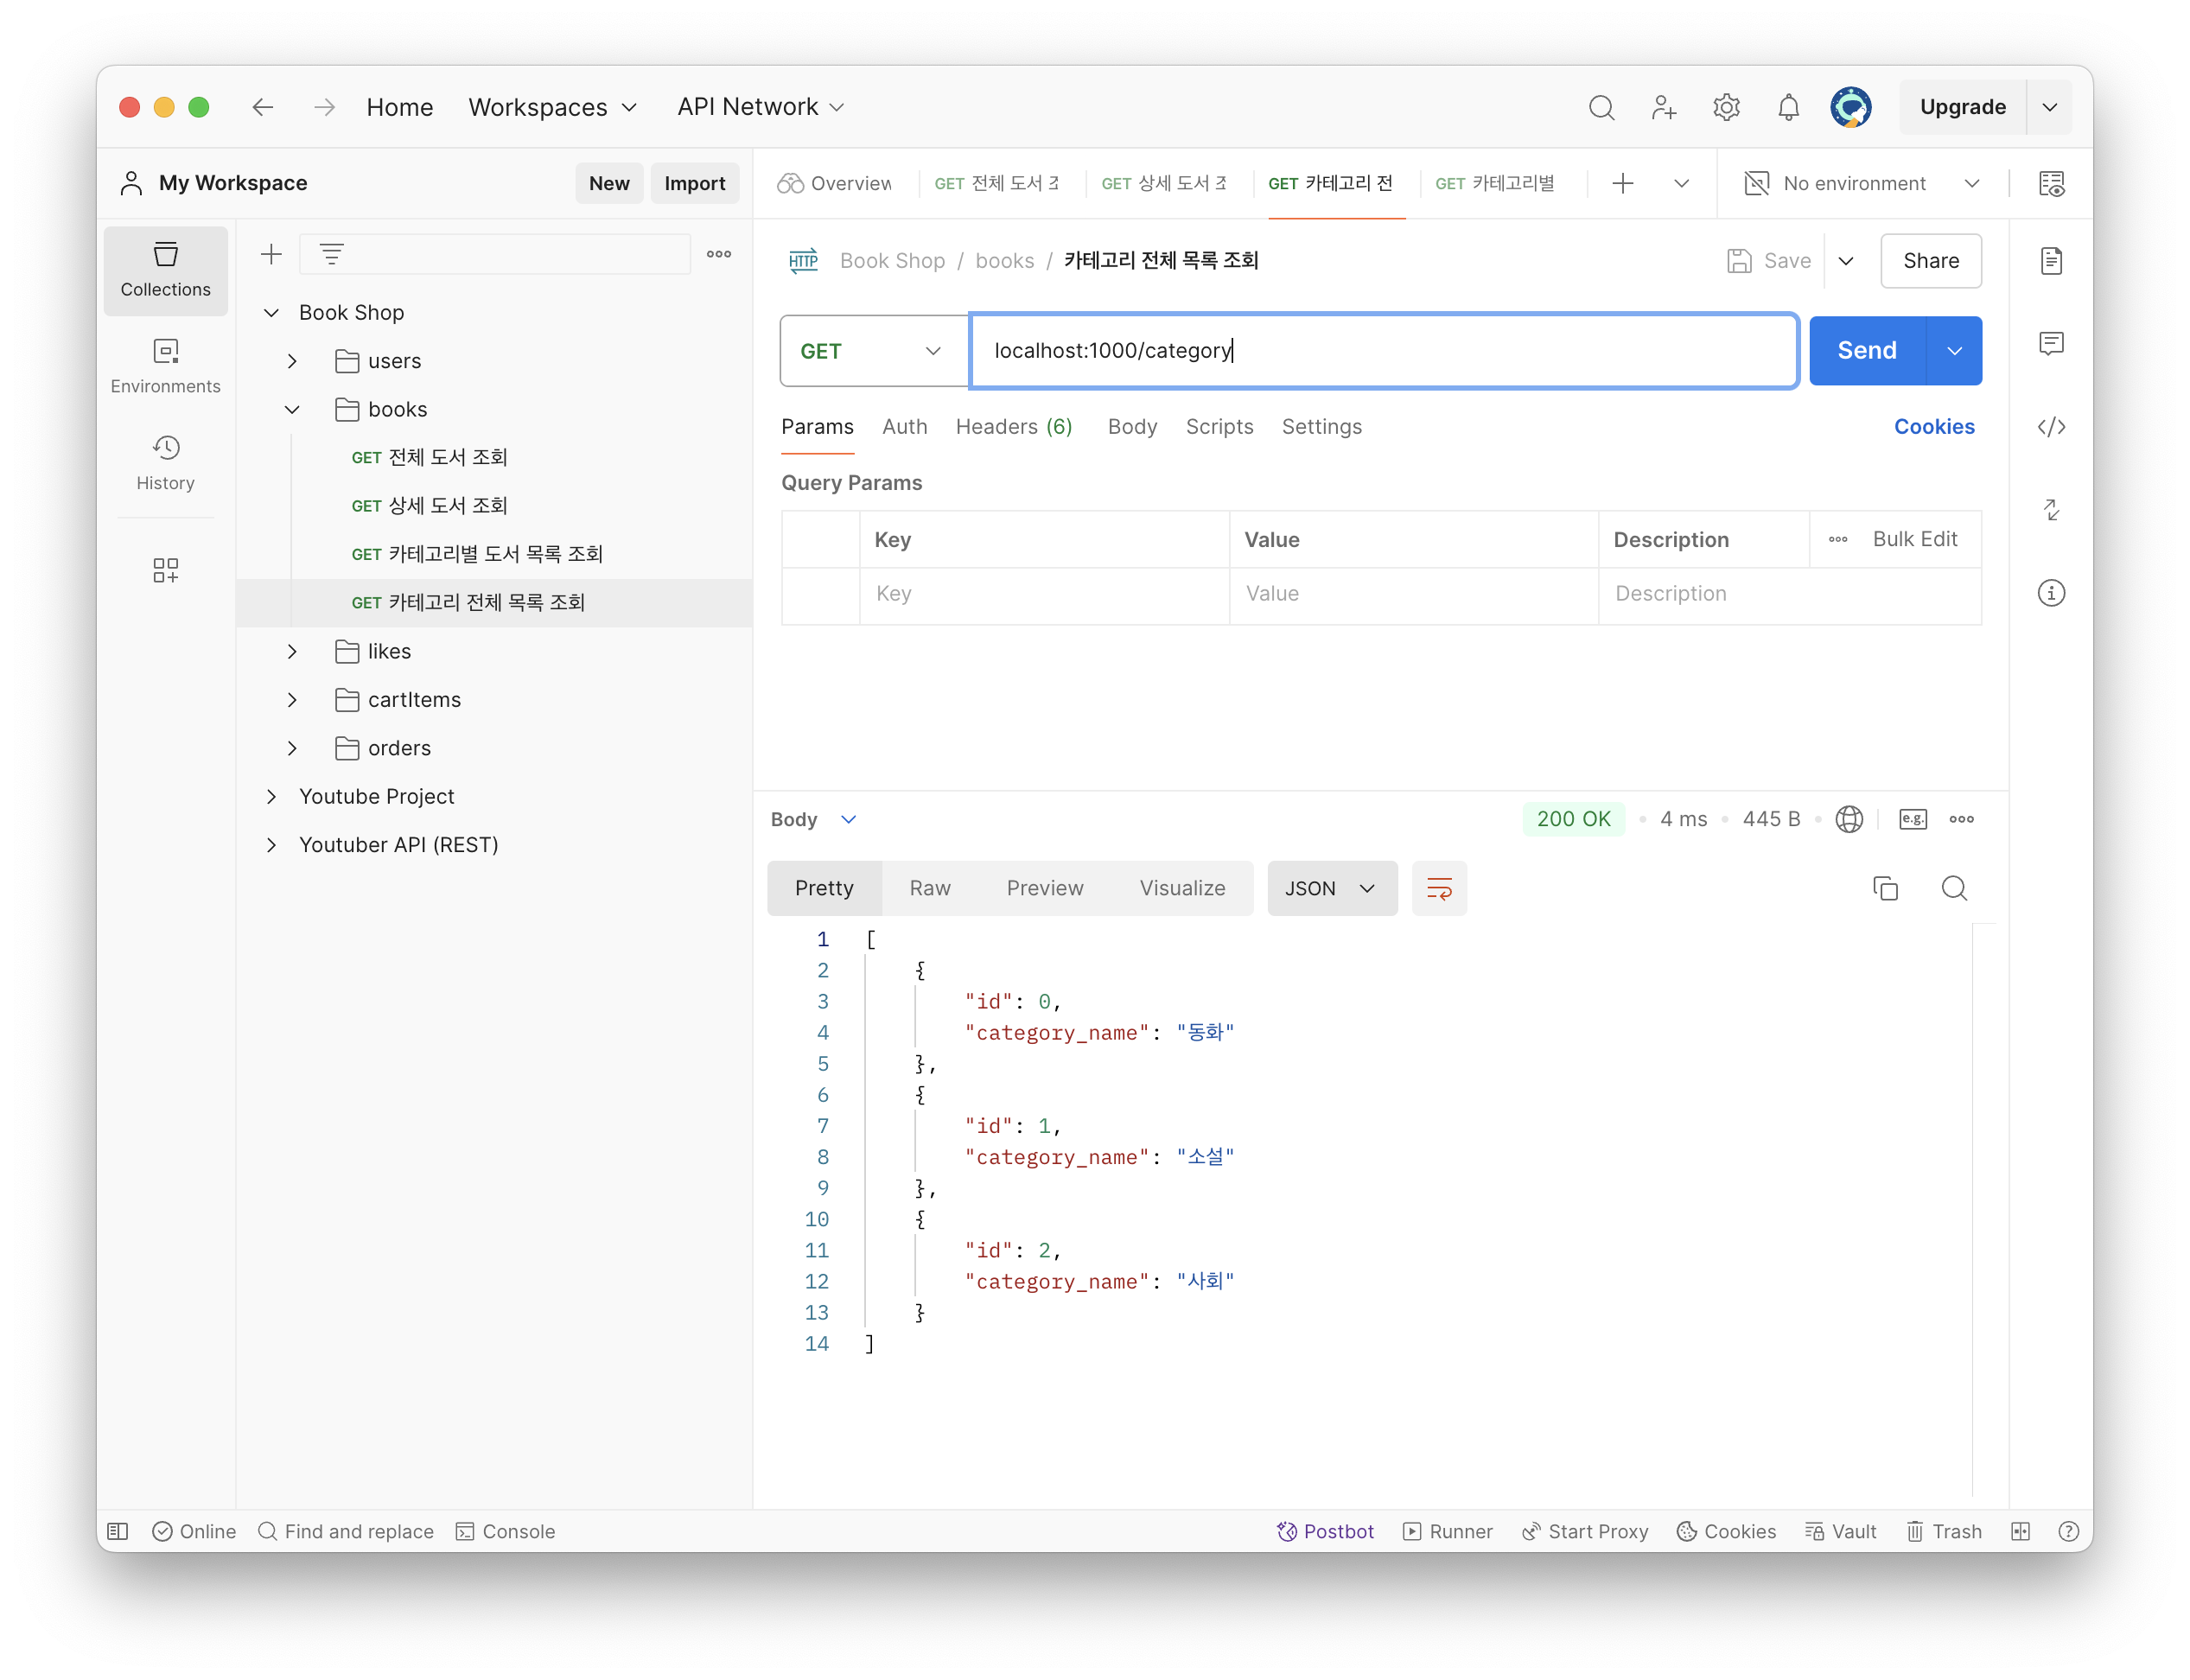
백엔드 서버(http://localhost:1000)로부터 "localhost:1000/category" 요청에 대한 JSON response를 받아와야 하는데, 그게 안 되어서 챗지피티한테 물어봤다.
오류:
(렌더 창)
Network Error AxiosError: Network Error at XMLHttpRequest.handleError (http://localhost:3000/static/js/bundle.js:52398:14) at Axios.request (http://localhost:3000/static/js/bundle.js:52848:41) at async fetchCategory (http://localhost:3000/static/js/bundle.js:145:20)
(개발자 도구의 네트워크 창)
CORS error
"category.api.ts:5 GET http://localhost:1000/category net::ERR_FAILED 200 (OK)" "Access to XMLHttpRequest at 'http://localhost:1000/category' from origin 'http://localhost:3000' has been blocked by CORS policy: No 'Access-Control-Allow-Origin' header is present on the requested resource."
그리고 챗지피티의 답변


CORS error를 해결하려면 백엔드 소스코드에 cors를 허용한다는 내용을 추가해줘야 한다고 했다.

이렇게 추가를 해주었다.
그리고 내가 벡엔드에서 카테고리명의 변수 이름을 'category_name'으로 썼는데,
프론트에서는 다 그냥 'name' 이라고 쓰는 중이었다.
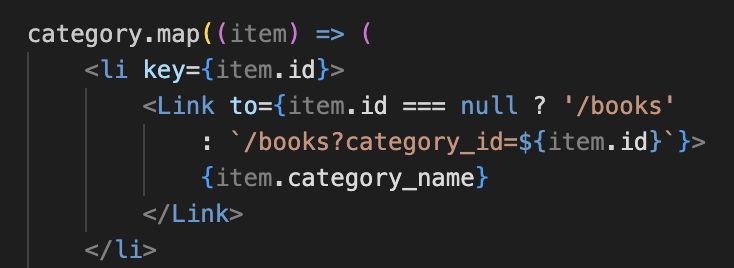
그래서 프론트 측에서 name을 category_name으로 바꾸었다. (Header.tsx, useCategory.ts, category.model.ts 코드에서 모두 바꿈)

그랬더니 서버로부터 받아온 카테고리 이름들을 프론트가 받아와서 잘 보여주고 있음을 확인할 수 있었다.
4. 회원가입
이메일, 비밀번호를 입력해서 회원가입 하는 기능을 구현할 것이다.
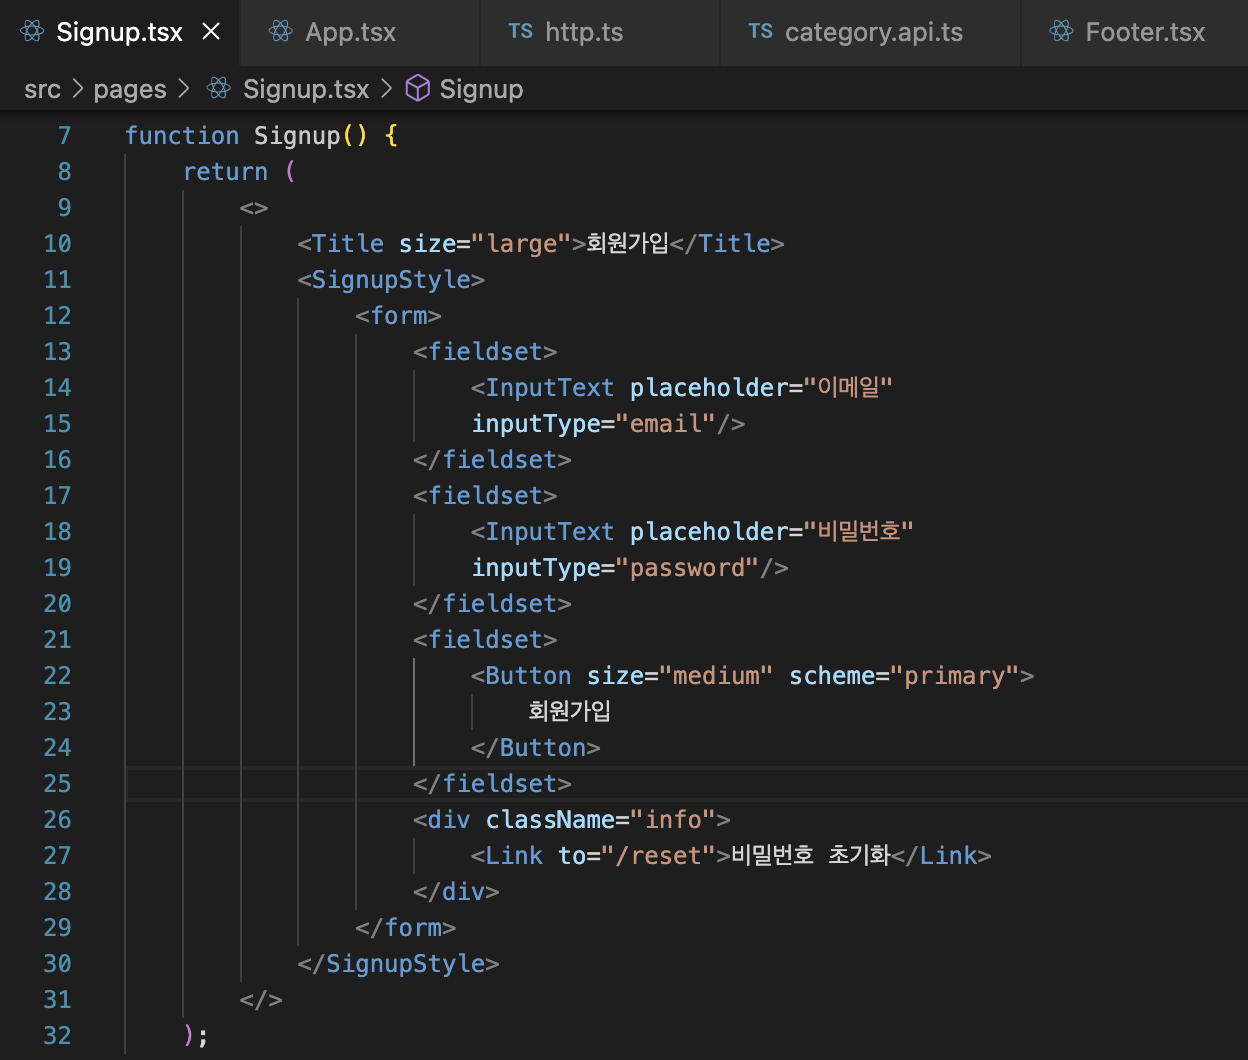
/pages/Signup.tsx, App.tsx


Signup.tsx 페이지를 새로 만들고, App.tsx에 /signup 라우트를 만들어주었다.
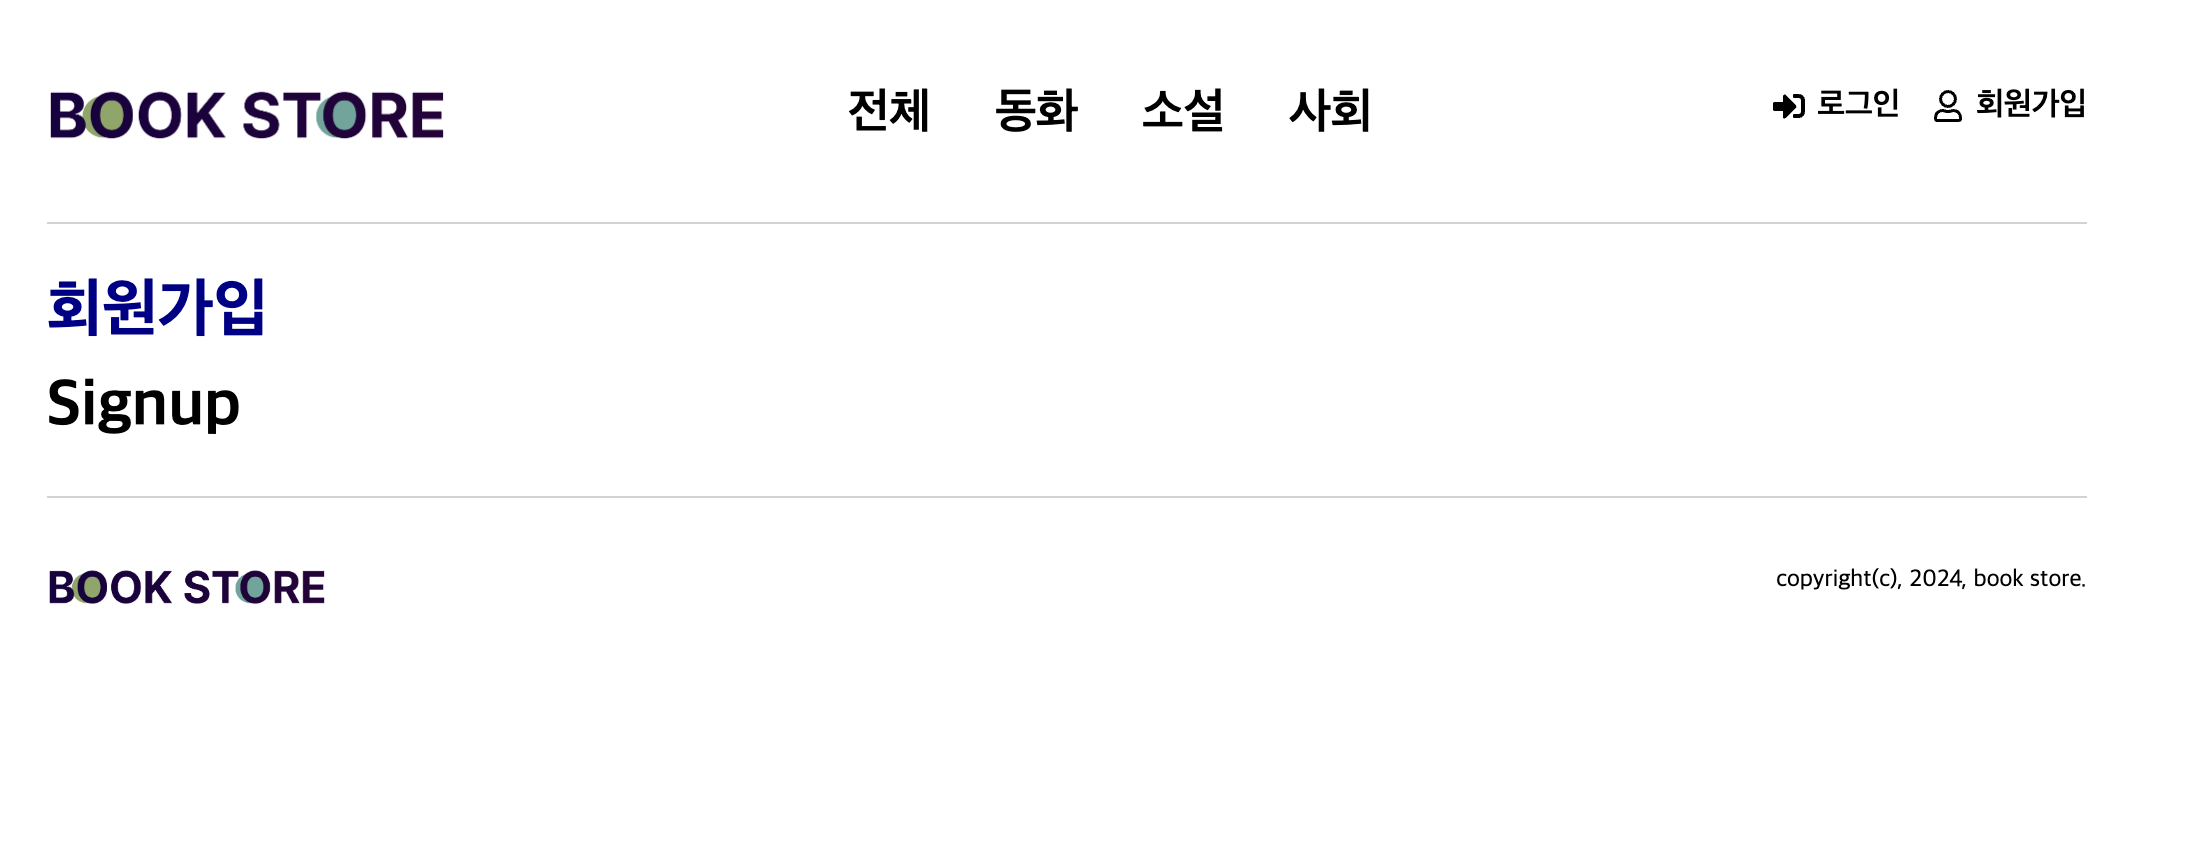
회원가입 버튼을 누르면 이렇게 뜬다.
이메일과 비밀번호를 입력하는 폼은 Form으로 만들고, Submit으로 제출하도록 할 것이다.
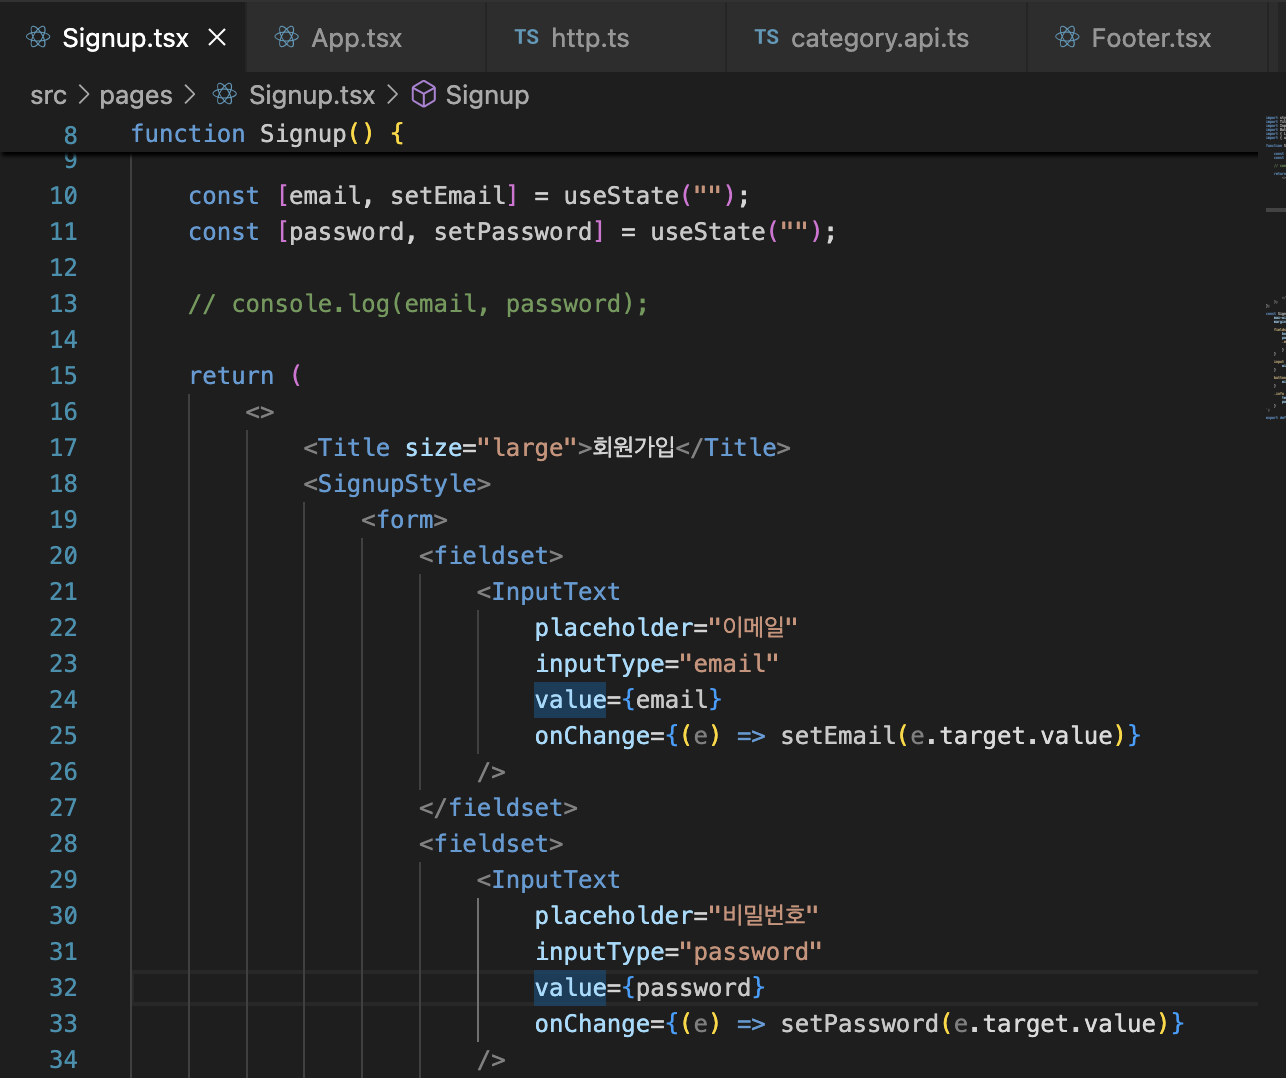
/pages/Signup.tsx


맨 처음에 만들어놓은 스타일드 컴포넌트인 Title, InputText, Button을 이렇게 사용했다. (오 ㄷㄷ)
근데 InputText의 경우, text만 인풋으로 받도록 되어있으므로, 다른 타입들도 받을 수 있도록 약간 수정해야 했다.
components/common/InputText.tsx, pages/Signup.tsx


이제 password 타입이 적용되어 비밀번호를 입력하면 자동으로 점 아이콘으로 보여지게 된다.
useState와 상태도 넣었다.
form에 onSubmit을 적용하기 위해 Button에 type="submit"을 적용했다.
근데 Button 기본 컴포넌트의 경우에도, type을 아직 받아들이지 못해서
interface Props extends React.ButtonHTMLAttributes<HTMLButtonElement>
이렇게 Props를 확장해주어서 버튼의 모든 엘리먼트를 받을 수 있도록 수정했다.
-> submit 타입의 버튼을 클릭하게 되면, form 안의 모든 내용을 onSubmit으로 진행하게 된다.
<fieldset>
    <Button type="submit" size="medium" scheme="primary">
        회원가입
    </Button>
</fieldset>
이렇게 버튼에 submit 타입을 추가하고

form에 hamdleSubmit 함수를 적용했다.
이제 email, password를 데이터 fetch 하는 함수에 적용해서 POST 등으로 넘기면 된다.
============================================================
email, password 등의 상태 변수들을 더 많이 쓰게 되면
onChange 함수도 많이 나오고, 상태 관리와 validation이 힘들어질 것이다.
그래서 알려진 라이브러리인 React Hook Form 을 사용할 것이다.
리액트 상태 관리, 폼 관리, validation에 특화된 라이브러리이다.
React Hook Form - performant, flexible and extensible form library
Performant, flexible and extensible forms with easy-to-use validation.
react-hook-form.com
npm install react-hook-form --save
import { useForm } from "react-hook-form";
useForm은 form을 관리하는 커스텀 훅이다.
바로 아래 코드는 useForm을 적용하기 전의 /pages/Signup.tsx이다.
import { useForm } from "react-hook-form";
import styled from "styled-components";
import Title from "../components/common/Title";
import InputText from "../components/common/InputText";
import Button from "../components/common/Button";
import { Link } from "react-router-dom";
import { useState } from "react";

function Signup() {

    const [email, setEmail] = useState("");
    const [password, setPassword] = useState("");

    // console.log(email, password);

    const handleSubmit = (event: React.
        FormEvent<HTMLFormElement>) => {
            // 기본적으로 html에서 폼을 submit하면
            // action이라는 attribute 페이지로 이동하는 것을 막아줌
            event.preventDefault();
            // console.log(email, password);
        }

    return (
        <>
            <Title size="large">회원가입</Title>
            <SignupStyle>
                <form onSubmit={handleSubmit}>
                    <fieldset>
                        <InputText
                            placeholder="이메일"
                            inputType="email"
                            value={email}
                            onChange={(e) => setEmail(e.target.value)}
                        />
                    </fieldset>
                    <fieldset>
                        <InputText
                            placeholder="비밀번호"
                            inputType="password"
                            value={password}
                            onChange={(e) => setPassword(e.target.value)}
                        />
                    </fieldset>
                    <fieldset>
                        <Button type="submit" size="medium" scheme="primary">
                            회원가입
                        </Button>
                    </fieldset>
                    <div className="info">
                        <Link to="/reset">비밀번호 초기화</Link>
                    </div>
                </form>
            </SignupStyle>
        </>
    );
};

const SignupStyle = styled.div`
    max-width: ${({ theme }) => theme.layout.width.small};
    margin: 80px auto;

    fieldset {
        border: 0;
        padding: 0 0 8px 0;
        .error-text {
            color: red;
        }
    }

    input {
        width: 100%;
    }

    button {
        width: 100%;
    }

    .info {
        text-align: center;
        padding: 16px 0 0 0;
    }
`;

export default Signup;
아래는 useForm을 적용한 이후의 /pages/Signup.tsx이다.
import { useForm } from "react-hook-form";
import styled from "styled-components";
import Title from "../components/common/Title";
import InputText from "../components/common/InputText";
import Button from "../components/common/Button";
import { Link } from "react-router-dom";
import { useState } from "react";

interface SignupProps {
    email: string;
    password: string;
}

function Signup() {

    // const [email, setEmail] = useState("");
    // const [password, setPassword] = useState("");

    // // console.log(email, password);

    // const handleSubmit = (event: React.
    //     FormEvent<HTMLFormElement>) => {
    //         // 기본적으로 html에서 폼을 submit하면
    //         // action이라는 attribute 페이지로 이동하는 것을 막아줌
    //         event.preventDefault();
    //         // console.log(email, password);
    //     }

    const {
        register,
        handleSubmit,
        formState: { errors },
    } = useForm<SignupProps>();

    // 폼을 submit했을 때의 액션
    const onSubmit = (data: SignupProps) => {
        console.log(data);
    };

    return (
        <>
            <Title size="large">회원가입</Title>
            <SignupStyle>
                <form onSubmit={handleSubmit(onSubmit)}>
                    <fieldset>
                        <InputText
                            placeholder="이메일"
                            inputType="email"
                            {...register("email", { required: true })}

                        />
                        {/* 에러 안에 이메일 에러가 있다면 */}
                        {/* submit이 처리되지 않고 에러 메세지를 출력 */}
                        {errors.email && <p
                            className="error-text">이메일을 입력해주세요.</p>
                        }
                    </fieldset>
                    <fieldset>
                        <InputText
                            placeholder="비밀번호"
                            inputType="password"
                            {...register("password", { required: true })}
                        />
                        {errors.password && <p
                            className="error-text">비밀번호를 입력해주세요.</p>
                        }
                    </fieldset>
                    <fieldset>
                        <Button type="submit" size="medium" scheme="primary">
                            회원가입
                        </Button>
                    </fieldset>
                    <div className="info">
                        <Link to="/reset">비밀번호 초기화</Link>
                    </div>
                </form>
            </SignupStyle>
        </>
    );
};

const SignupStyle = styled.div`
    max-width: ${({ theme }) => theme.layout.width.small};
    margin: 80px auto;

    fieldset {
        border: 0;
        padding: 0 0 8px 0;
        .error-text {
            color: red;
        }
    }

    input {
        width: 100%;
    }

    button {
        width: 100%;
    }

    .info {
        text-align: center;
        padding: 16px 0 0 0;
    }
`;

export default Signup;


인풋이 없는 상태로 submit을 하면 에러 메세지를 보여준다.
-> 상태 변수(useState 사용) 필요 없이 useForm 이라는 커스텀 훅을 통해 회원가입을 구현했다.
이어서 실제로 데이터를 받아서 등록하는 시스템을 만들겠다.
API를 사용한다.!!!!
/api/auth.api.ts, /pages/Signup.tsx


auth.api.ts를 만들고, 그 ㅏㅇㄴ의 signup 함수를 Signup.tsx에 적용해주었다.
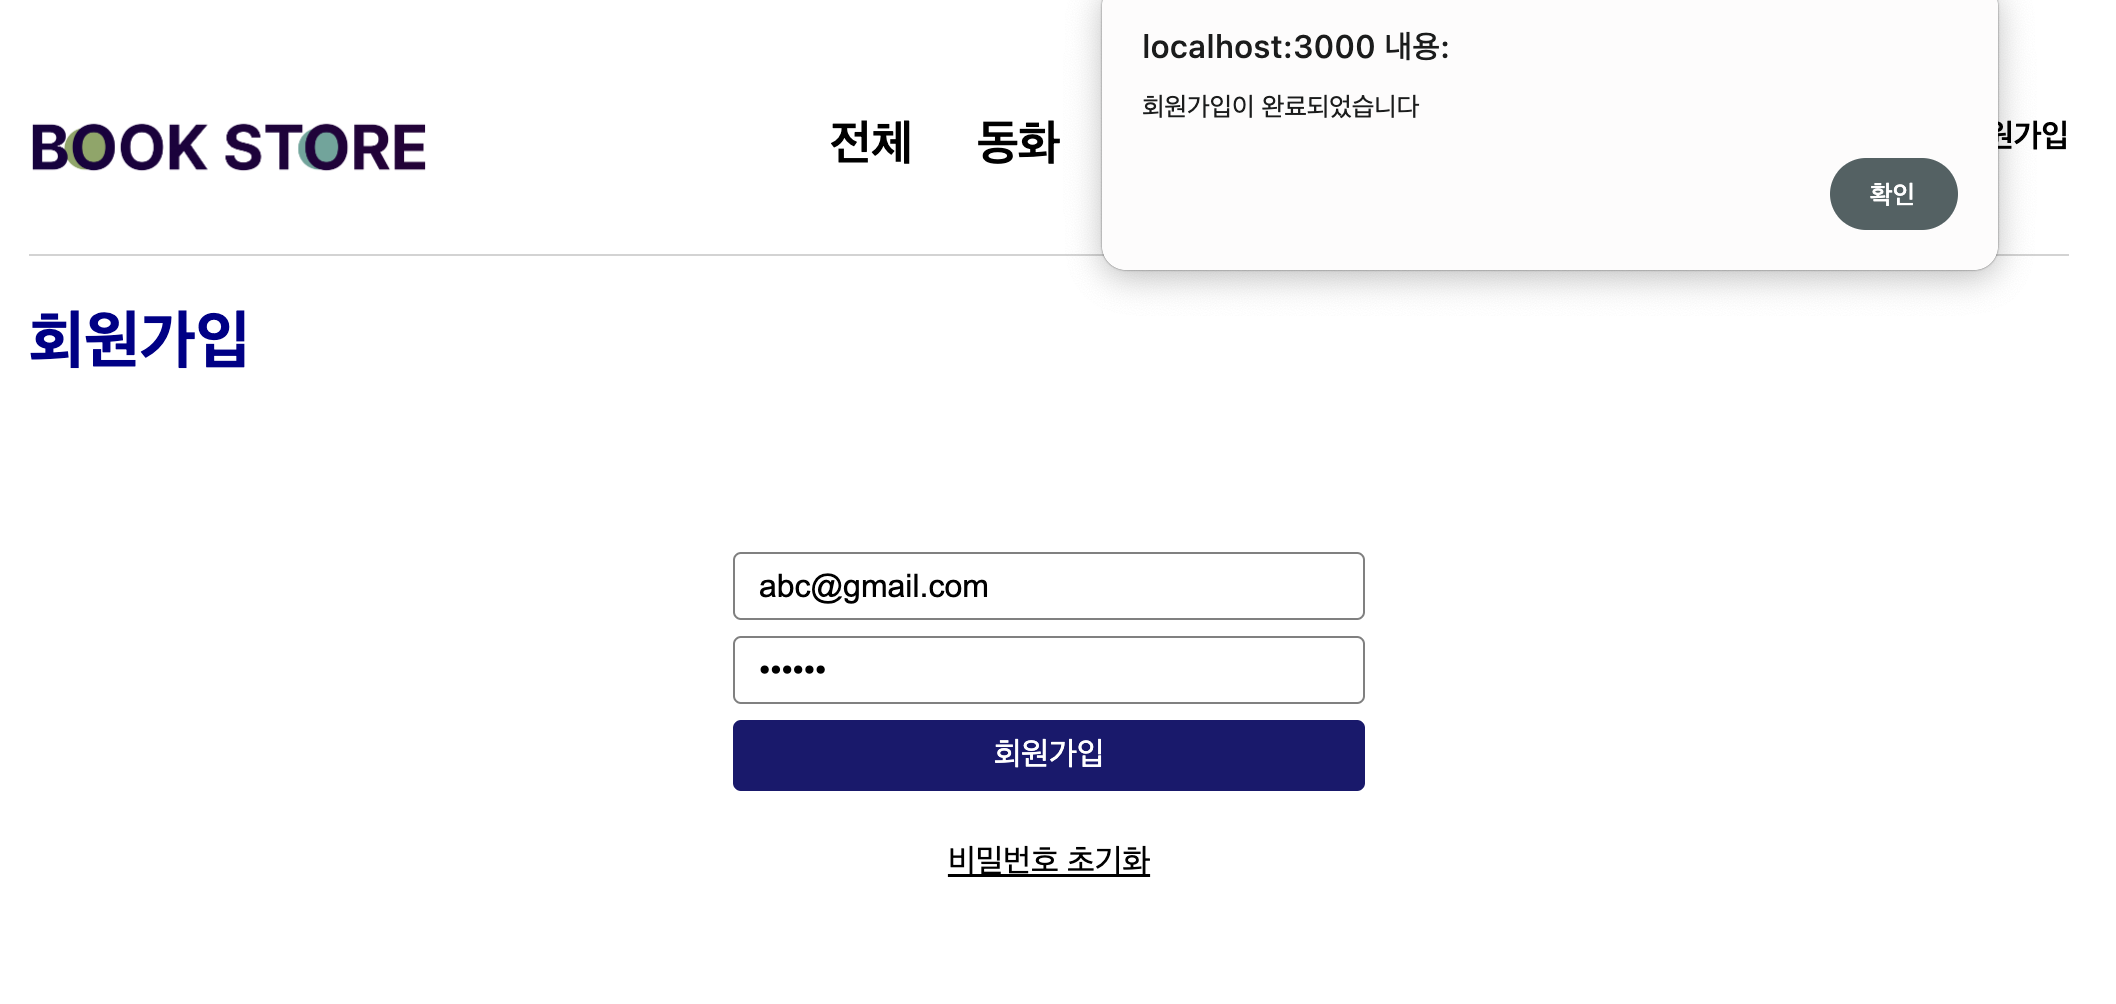
회원가입을 해주는 함수이고, 완료되면 완료창을 띄워준다.
**오류발생)

근데 이메일, 비번을 입력하고 회원가입 버튼을 누르니 이렇게 오류가 떴다.

그래서 백엔드 파트의 코드를 보고, Postman에서 "localhost:1000/users/join"을 실행해봤는데, 잘 작동했다.
    const response = await httpClient.post(".users/join", userData);

    const response = await httpClient.post("/users/join", userData);
근데 그냥 auth.api.ts 에서 / 대신 . 을 써서 서버로 연결이 안 되었을 뿐이었다..
이제 된다.
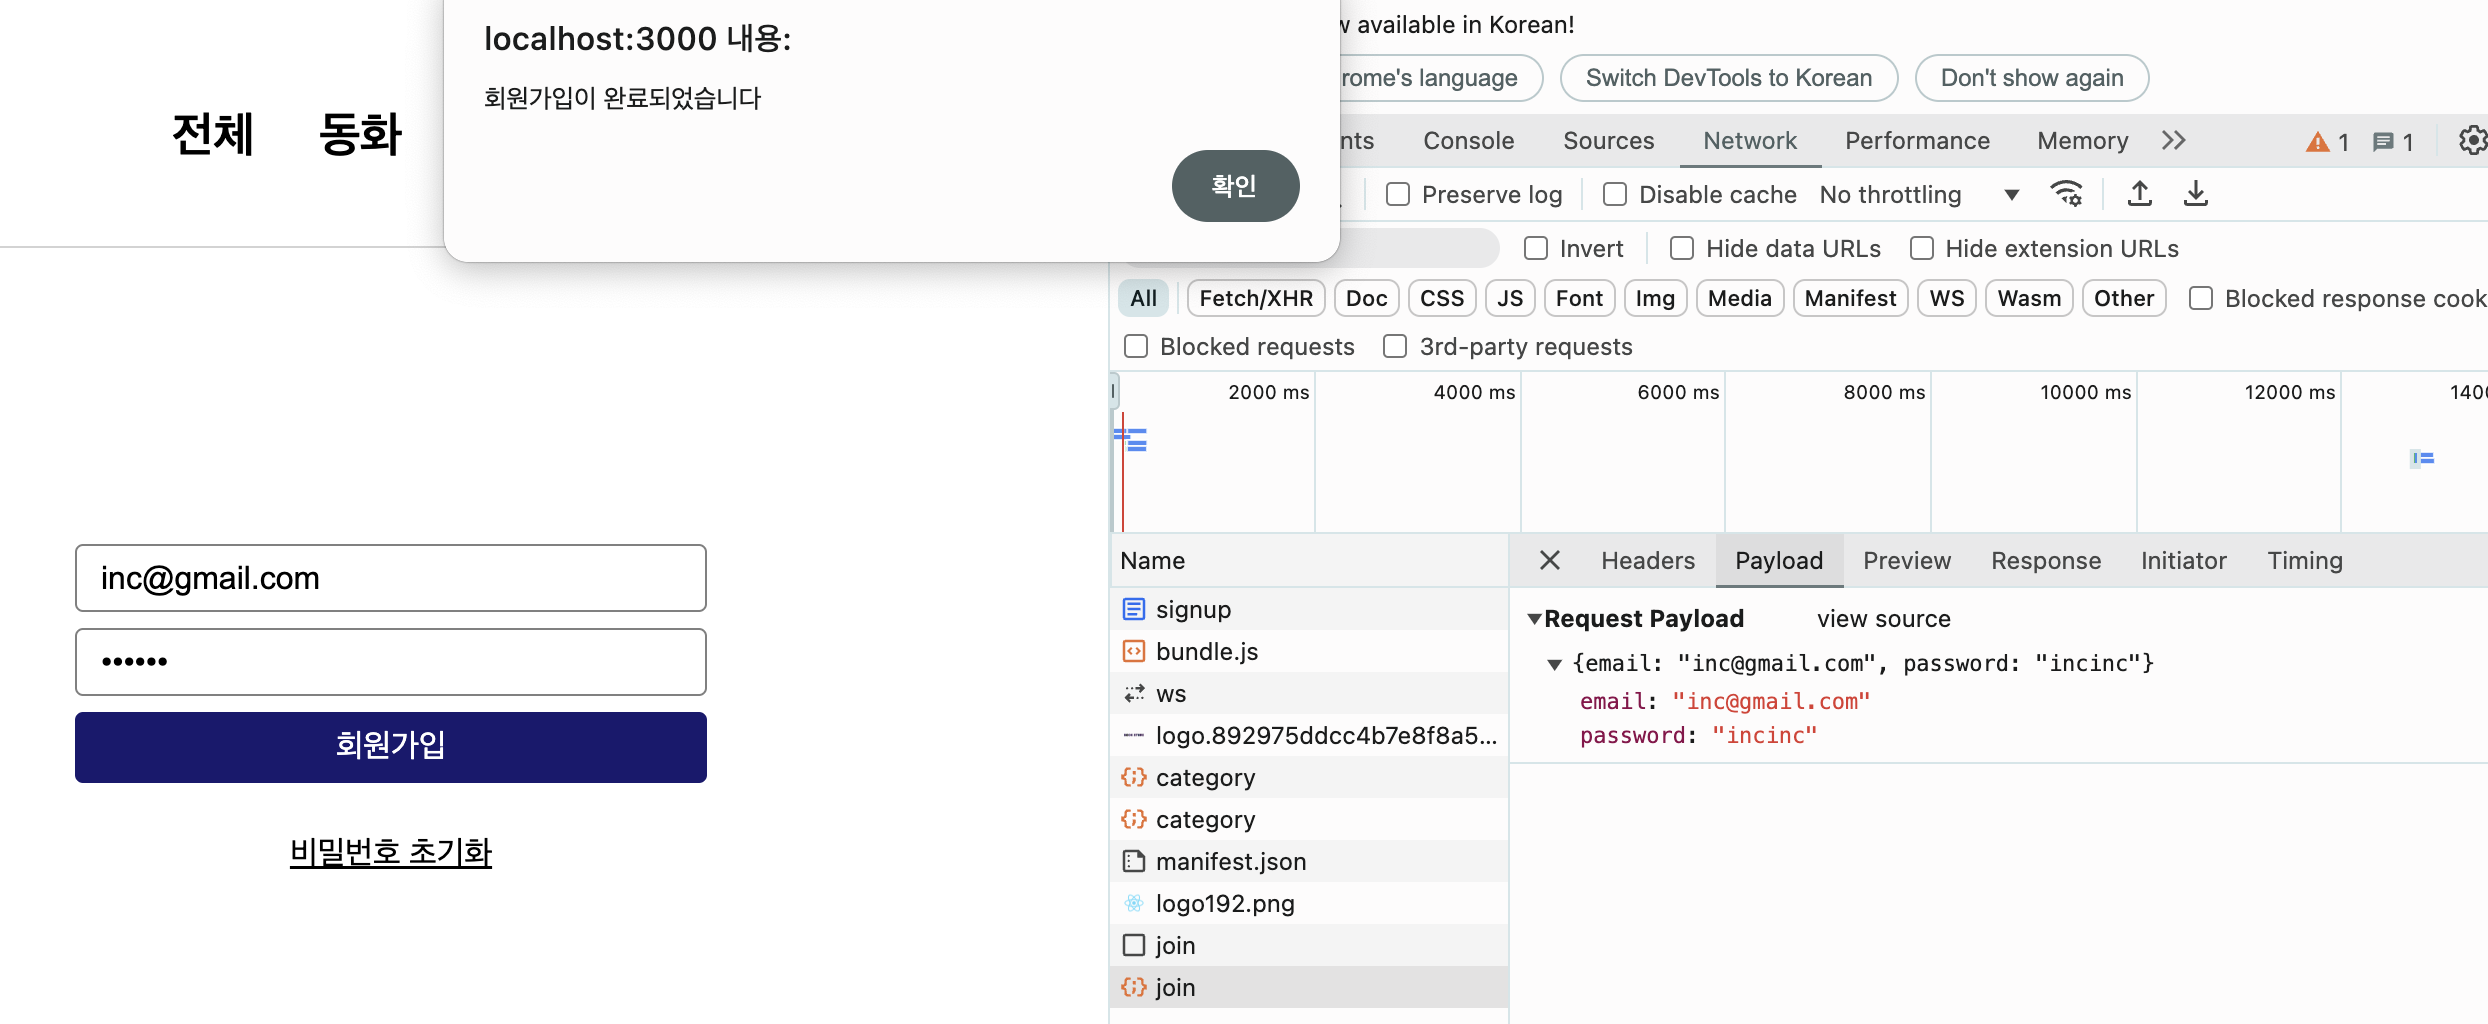
개발자도구를 확인하니 성공 메세지가 제대로 돌아왔음을 볼 수 있었다.
window alert 같은 경우, 추후에 다른 디자인으로 변경할 때 혹은 라이브러리로 전활할 때 번거로울 수 있으므로
미리 커스텀 훅을 만들어 놓는다.
-> 훅만 수정하면 되도록
/hooks/useAlert.ts, /pages/Signup.tsx


끝
'Web' 카테고리의 다른 글
| Streamlit 사용기 (2) | 2025.01.28 |
|---|---|
| 시각화, 애니메이션에 있어서 CSS와 JS의 역할 (0) | 2024.04.22 |

